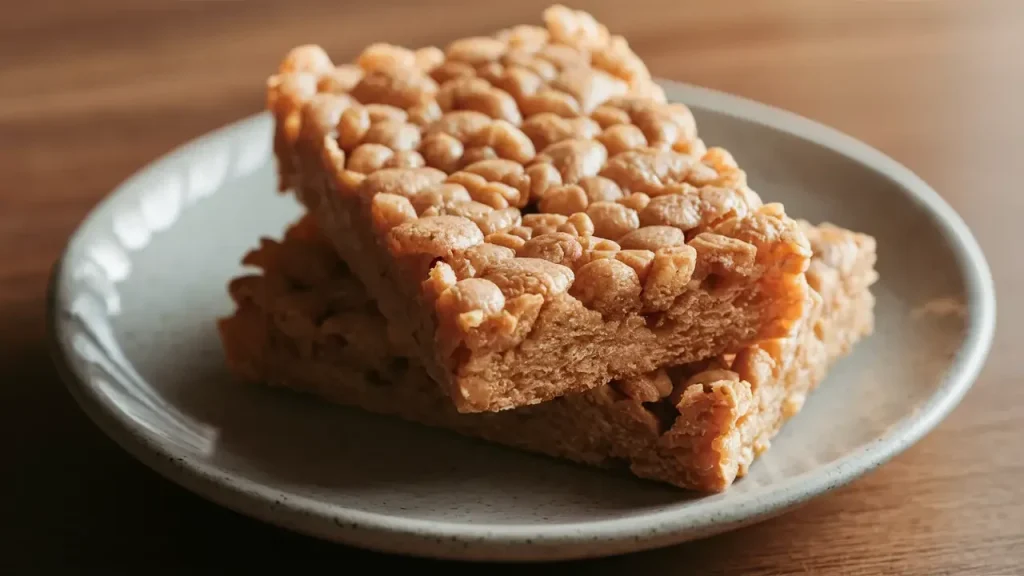
Rice Krispies Protein Bars
If you’re always on the lookout for easy, high-protein snacks that actually taste good, you’re going to love these Rice Krispies Protein Bars. They’re a fun twist on the classic childhood treat—but with a nutritious upgrade that supports your goals, whether that’s building muscle, staying energized throughout the day, or just curbing those mid-afternoon cravings.
These bars come together quickly with just a handful of ingredients, making them perfect for meal prep or a grab-and-go option during a busy week. And the best part? They taste indulgent without derailing your nutrition. Whether you’re a gym regular or just want a smarter way to satisfy your sweet tooth, this recipe checks all the boxes.
Why Make Homemade Protein Bars Instead of Buying?
Walk into any grocery store or supplement shop and you’ll see rows of protein bars promising energy, muscle recovery, or a “guilt-free” snack. The problem? Many of them are packed with artificial sweeteners, preservatives, or unnecessary fillers that don’t exactly scream healthy. Not to mention—they can get expensive if you’re eating them regularly.
When you make your own Rice Krispies Protein Bars, you’re in full control of what goes in. You get to skip the added junk, keep the ingredients clean, and save money in the process. Plus, you can customize the flavors to fit your preferences instead of being stuck with whatever is on the shelf. Homemade also means fresher—no sitting in a warehouse for months before making its way into your pantry.
Cost Comparison: Homemade vs Store-Bought
A box of 12 protein bars from the store can run anywhere from $18–$30 depending on the brand—that’s $1.50 to $2.50 per bar. When you make your own, the cost drops significantly.
A batch of Rice Krispies Protein Bars typically comes out to about $6–$8 for 12 servings (roughly 50–65 cents per bar). Not only are they cheaper, but you’re also getting higher-quality ingredients and the satisfaction of knowing exactly what’s in them.
Serving Size and Preparation Time
Serving Size: Makes 12 bars
Preparation Time: 10 minutes prep, plus 1 hour chill time
These bars are perfect for a quick snack, post-workout boost, or healthy dessert. The recipe comes together in minutes, making it an easy addition to your weekly meal prep routine.
Macros and Nutritional Information
Per bar (based on 12 servings):
Calories: ~180
Protein: ~10g
Fat: ~7g
Carbohydrates: ~20g
These Rice Krispies Protein Bars offer a well-balanced mix of protein, healthy fats, and carbohydrates—making them ideal for post-workout recovery or a satisfying mid-day snack. The protein supports muscle repair and satiety, while the natural peanut butter and honey provide lasting energy. With no refined sugar and a short ingredient list, they’re a cleaner, homemade alternative to many store-bought bars.
Ingredients
Base Ingredients:
3 cups Rice Krispies cereal
1 cup vanilla protein powder
½ cup natural peanut butter
½ cup honey
1 tsp vanilla extract
¼ tsp salt
Optional Add-Ins:
2 tbsp mini chocolate chips
1 tbsp coconut oil
Step-by-Step Instructions
1. Prepare your pan
Line an 8×8-inch baking dish with parchment paper, leaving a little overhang on the sides for easy removal later. Set aside.
2. Mix the dry ingredients
In a large mixing bowl, combine the Rice Krispies cereal, vanilla protein powder, and salt. Stir to evenly distribute the dry ingredients.
3. Warm the wet ingredients
In a small saucepan over low heat, gently warm the peanut butter and honey until smooth and well combined. Stir frequently and remove from heat as soon as it’s melted. Add the vanilla extract and mix again.
4. Combine everything
Pour the warm mixture over the dry ingredients. Stir thoroughly until everything is evenly coated and the cereal is fully mixed in.
5. Press into the pan
Transfer the mixture to the prepared pan. Use a spatula or the back of a spoon to press it down firmly and evenly. If you’re using chocolate chips, sprinkle them on top and gently press them into the surface while the mixture is still warm.
6. Chill to set
Place the pan in the fridge for at least 1 hour, or until the bars are firm and set.
7. Slice and store
Once set, lift the bars out using the parchment paper and cut into squares or rectangles. Store in an airtight container in the fridge for up to one week.
Tips for Best Results
Press firmly
Make sure to press the mixture tightly into the pan so the bars hold their shape. Using a piece of parchment paper on top can help you press down evenly without sticking.
Use runny peanut butter
A smoother, natural peanut butter blends more easily and helps the bars come together without crumbling. If yours is thick or dry, warm it slightly before mixing.
Don’t overheat the honey
Warm just enough to blend with the peanut butter. Overheating can make the mixture too thin or cause it to harden once cooled.
Chill thoroughly
Let the bars set in the fridge for at least an hour. This helps them firm up and makes cutting them cleaner and easier.
Cut with a sharp knife
For neat, clean edges, use a sharp knife and wipe it between cuts if needed. A warm knife can also make slicing easier.
Double the batch
These go fast—especially if you’re sharing with family or packing them for the week. Consider doubling the recipe and using a 9×13-inch pan.
Troubleshooting Common Issues
Even simple recipes can have little hiccups—here’s how to fix the most common ones:
Bars Falling Apart: The mixture might be too dry. Add a touch more honey or nut butter to help it stick together.
Too Sticky: You may not have chilled them long enough. Give them extra time in the fridge or try cutting with a lightly greased knife.
Rock-Hard Texture: The peanut butter and honey mixture was overheated. Next time, warm it gently over low heat just until smooth.
A little adjustment goes a long way to getting the perfect chewy texture every time.
Ingredient Swaps and Substitutions
Not every kitchen (or diet) looks the same, so here are a few easy swaps you can make without ruining the recipe:
Nut-Free: Replace peanut butter with sunflower seed butter or tahini for a school-safe option.
Vegan-Friendly: Use plant-based protein powder and swap honey for maple syrup or agave.
Different Protein Powders: Chocolate, cookies & cream, or even unflavored protein powders work—just keep in mind they’ll slightly change the flavor.
Cereal Options: While Rice Krispies are the classic choice, you can experiment with puffed quinoa, puffed rice, or even cornflakes for a crunchier texture.
Pairing Ideas for a Balanced Snack
While these bars are solid on their own, pairing them with other foods can turn them into a complete mini-meal:
With a piece of fruit (like an apple or banana) for extra fiber.
With a side of Greek yogurt for added protein and probiotics.
Alongside a smoothie for a refreshing, nutrient-packed combo.
With a hot cup of coffee or tea if you’re looking for an afternoon treat.
FAQs About Rice Krispies Protein Bars
Can I use flavored protein powder?
Absolutely! Flavored powders like chocolate, cinnamon roll, or cookies & cream can add a fun twist. Just be aware some are sweeter than others, so you may want to adjust the honey slightly.
Can I skip the protein powder?
Yes—you’ll still get chewy, delicious bars, though the protein content will be lower. If skipping, try adding a handful of chopped nuts or seeds for a little extra nutrition.
Do these taste like classic Rice Krispies Treats?
They have the same crunchy-chewy vibe, but they’re less sweet and more filling thanks to the peanut butter and protein powder. Think of them as the grown-up, upgraded version.
Are they gluten-free?
They can be! Just make sure you’re using a gluten-free brand of crisped rice cereal (many mainstream ones contain malt, which has gluten).
Conclusion
These Rice Krispies Protein Bars are a delicious, simple way to boost your protein intake without sacrificing flavor or convenience. Perfect for busy days, workouts, or whenever you need a quick, nourishing snack, they’re easy to customize and make ahead. Give this recipe a try—you might just find your new favorite go-to bar that satisfies both your sweet tooth and your wellness goals.