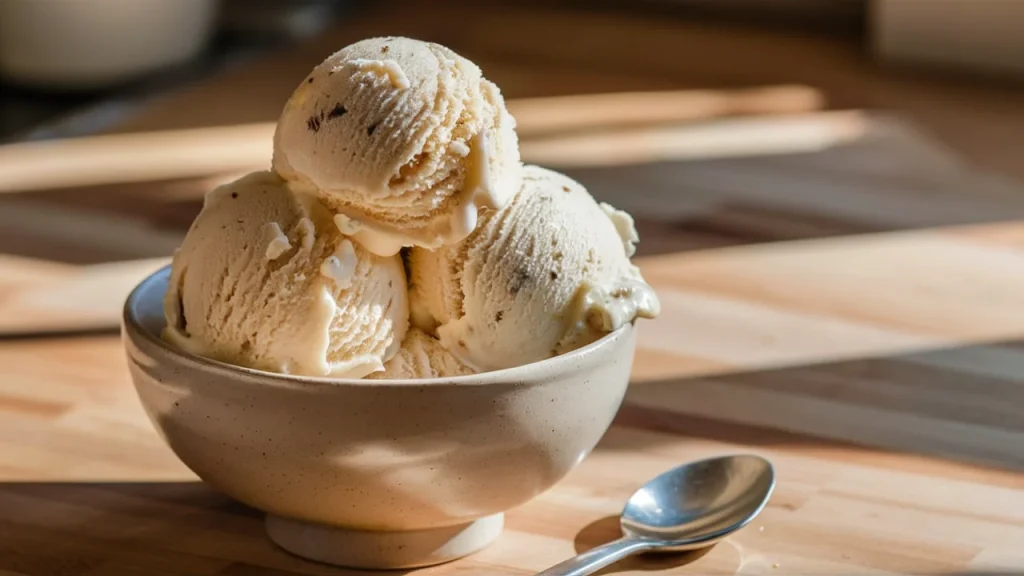
Ninja Creami Protein Coconut Ice Cream: A Guilt-Free Treat
Finding a delicious, creamy, and satisfying dessert that aligns with your health goals can be a challenge. That’s where the Ninja Creami comes in—a game-changing appliance that transforms simple ingredients into rich, indulgent ice cream with ease. Unlike traditional ice cream makers, the Ninja Creami allows you to create high-protein, low-sugar treats that fit into a balanced lifestyle.
One of the best flavors to make? Protein-packed coconut ice cream. Coconut adds a naturally creamy texture and a hint of tropical sweetness, while a high-quality protein source ensures that your dessert is not only delicious but also nutritious. Whether you’re looking to support muscle recovery, maintain satiety, or simply indulge without guilt, this recipe delivers. Plus, it’s dairy-free and customizable to fit different dietary preferences.
With just a few wholesome ingredients and the power of the Ninja Creami, you can enjoy a frozen treat that’s just as satisfying as store-bought options—without the extra sugar or artificial additives. Get ready to whip up a simple, healthy, and refreshing dessert that you’ll want to make again and again.
Serving Size and Preparation Time
Serving Size: This recipe makes approximately 4 servings, each offering a satisfying scoop of creamy, high-protein ice cream.
Preparation Time: While the active preparation time is around 10-15 minutes, be sure to freeze the mixture for 24 hours before processing it in the Ninja Creami. Total time from start to finish is about 1 day, but the hands-on effort is minimal!
Macros and Nutritional Information
Per Serving (approx.):
- Calories: 150
- Protein: 15g
- Fat: 9g
- Carbs: 5g
This protein coconut ice cream offers a balanced nutritional profile, making it a perfect guilt-free treat. With 15g of protein per serving, it supports muscle recovery and keeps you feeling full. The healthy fats from coconut provide a creamy texture and support overall wellness. At just 5g of carbs, it’s a low-carb dessert option, making it ideal for those following a fitness or weight-conscious lifestyle. Enjoy a nutritious, satisfying treat with every scoop!
Ingredients
- 1 cup unsweetened coconut milk
- 1 scoop vanilla or coconut-flavored protein powder
- 1-2 tablespoons unsweetened shredded coconut
- 1-2 tablespoons sweetener of choice
- ½ teaspoon vanilla extract
- Pinch of salt
Optional Add-Ins:
- ½ teaspoon coconut extract
Step-by-Step Recipe
Prepare the Base
In a mixing bowl, combine the unsweetened coconut milk, protein powder, shredded coconut, sweetener, vanilla extract, and a pinch of salt. Stir until all ingredients are well incorporated and the mixture is smooth. If the protein powder doesn’t dissolve completely, you can use a whisk or a blender for a few seconds to ensure a lump-free base.Freeze the Mixture
Pour the mixture into the Ninja Creami pint container. Make sure it’s evenly spread out. Seal the container with the lid and place it in the freezer. For the best results, freeze it for 24 hours to allow the mixture to fully solidify.Process in the Ninja Creami
After freezing, remove the pint container from the freezer. Attach it to the Ninja Creami base and select the “Ice Cream” function. Let the machine work its magic, processing the mixture into a smooth and creamy texture.Optional Add-Ins
Once the ice cream is ready, you can stir in any optional add-ins like the coconut extract for an extra boost of flavor. If you prefer, you can also top your ice cream with a bit of shredded coconut for added texture.Serve and Enjoy
Scoop the freshly made protein coconut ice cream into bowls or cones. Serve immediately for the creamiest texture, or return it to the freezer for a firmer consistency. Enjoy your guilt-free, high-protein treat!
Tips for Perfect Texture with the Ninja Creami
Achieving the perfect texture for your protein coconut ice cream is key to enjoying a smooth, creamy treat. Here are a few tips to ensure your ice cream turns out just right every time:
Freeze for 24 Hours
Ensure the mixture is frozen for a full 24 hours. This allows the ingredients to solidify properly, giving the Ninja Creami enough time to transform it into a smooth, creamy consistency.Blend for Smoothness
If your protein powder is clumping or not mixing well, give the base a quick blend in a blender before freezing. This will help create a smoother mixture and improve the final texture.Don’t Overfill the Pint
When pouring the mixture into the Ninja Creami pint container, make sure it’s not filled past the max fill line. This allows the machine to process the mixture evenly and achieve the best consistency.Use Full-Fat Coconut Milk for Creaminess
If you prefer an ultra-creamy texture, opt for full-fat coconut milk. It helps create a richer, smoother base, making the ice cream feel indulgent without the extra calories from traditional ice cream.Respin if Necessary
If after the first spin the texture seems too soft or icy, simply use the “Respin” function. This will refine the texture and make it even smoother.
By following these simple tips, you’ll be able to create the perfect protein coconut ice cream every time, with a rich, creamy texture that rivals store-bought versions!
Serving Suggestions & Variations
This protein coconut ice cream is delicious on its own, but you can easily elevate the experience with a variety of fun and tasty toppings. Here are a few ideas to add texture and extra flavor:
- Toasted Coconut: Toast a handful of shredded coconut in a dry pan until golden brown for a crunchy, nutty topping that enhances the coconut flavor.
- Nuts: Chopped almonds, walnuts, or cashews add a satisfying crunch and healthy fats.
- Dark Chocolate Chips: If you’re craving a touch of sweetness, sprinkle a few dark chocolate chips on top for a rich contrast.
For those who love variety, try experimenting with different flavors to keep things exciting:
- Chocolate Coconut: Add a scoop of chocolate protein powder to the base, and you’ve got a rich chocolate-coconut combo.
- Berry Coconut: Blend in fresh or frozen berries like raspberries, strawberries, or blueberries to create a refreshing, fruity version. The natural sweetness of the berries pairs wonderfully with the creamy coconut base.
These variations are a great way to mix things up and cater to different tastes while still keeping your treat high in protein and low in guilt. Enjoy exploring different combinations!
Pairing Ideas: What to Serve With Protein Coconut Ice Cream
While this ice cream is delicious on its own, pairing it with the right foods can take it to the next level. Whether you want a light, refreshing combination or a more indulgent dessert experience, here are some ideas:
Fresh Fruit: Mango, pineapple, or banana slices complement the tropical coconut flavor beautifully.
Protein Brownies or Cookies: Add a scoop of your ice cream on top of a warm protein brownie for a satisfying post-workout treat.
Nut Butter Drizzle: A spoonful of almond butter or peanut butter adds richness and boosts healthy fats.
Granola or High-Protein Cereal: Sprinkle a handful for a crunchy topping that adds texture and extra nutrition.
These simple pairings make it easy to turn your protein ice cream into a more filling snack, a balanced dessert, or even a fun brunch option.
Storage and Meal Prep Tips
One of the best parts about using the Ninja Creami is how easy it is to meal prep desserts ahead of time. Here are some storage tips to keep your protein coconut ice cream fresh and delicious:
Freezer Life: Homemade protein ice cream is best enjoyed within 1–2 weeks. After that, it may lose some of its creaminess.
Storage Containers: Keep your ice cream in airtight pint containers to prevent freezer burn. Silicone lids work great for keeping the texture intact.
Meal Prep Hack: Prep 2–3 pints at once, each with different flavors or mix-ins. That way, you’ll always have a fun variety ready to go when cravings hit.
Quick Refresh: If the ice cream gets too firm after several days, simply pop it back into the Ninja Creami and use the “Respin” function to restore its creaminess.
With just a little planning, you’ll have a freezer stocked with healthy, protein-packed treats whenever you need them.
Frequently Asked Questions (FAQ)
Can I make this without a Ninja Creami?
Yes! While the Ninja Creami gives the smoothest texture, you can use a high-speed blender or food processor. Just blend the frozen mixture until creamy.
Does it taste like regular ice cream?
It’s slightly lighter than traditional ice cream, but the creaminess of coconut milk and the right protein powder make it surprisingly close to the real thing.
What’s the best way to add mix-ins?
The Ninja Creami has a “Mix-In” function designed for this. You can fold in shredded coconut, dark chocolate chips, or crushed nuts after the first spin.
How can I increase the protein even more?
Use a double scoop of protein powder, or stir in Greek yogurt before freezing. You can also top your bowl with high-protein granola or nut butter for an extra boost.
Is it suitable for different diets?
Absolutely! You can make it keto-friendly by using low-carb sweeteners, or vegan by choosing plant-based protein powder and dairy-free milk.
Conclusion
If you’re looking for a delicious, high-protein treat that satisfies your sweet tooth without the guilt, this protein coconut ice cream is a must-try. The Ninja Creami makes it easy to create a creamy, indulgent dessert that’s not only packed with protein but also full of healthy fats and low in carbs. It’s the perfect treat for a post-workout snack or a refreshing dessert anytime.
What’s great about this recipe is its versatility. You can experiment with different flavors—from rich chocolate coconut to fruity berry coconut—and create your own signature twist. Whether you stick with the classic coconut flavor or get creative with new additions, this recipe is a simple, customizable option that you’ll want to make over and over again. So, grab your Ninja Creami and start experimenting—your perfect frozen treat is just a spin away!