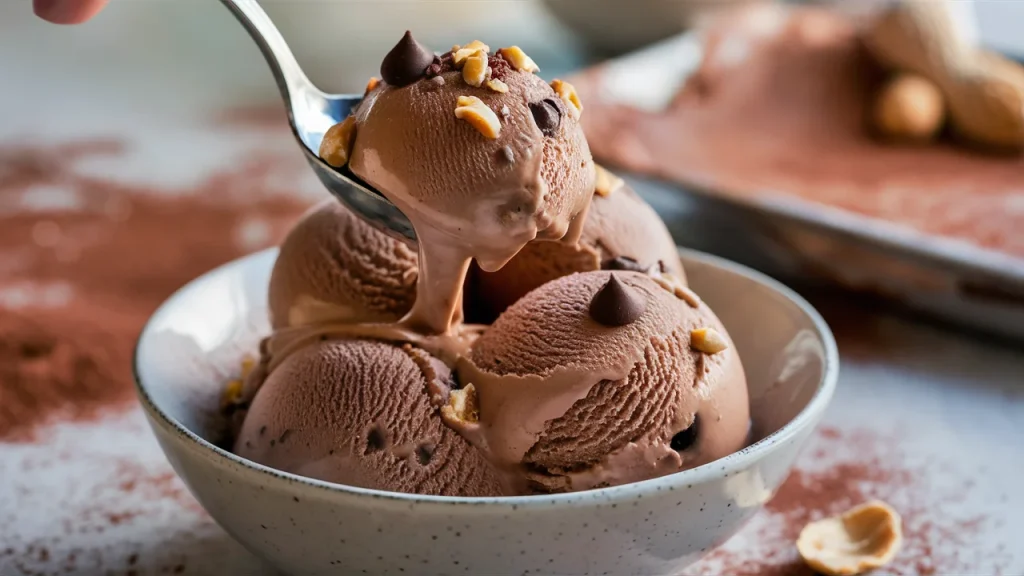
Chocolate Peanut Butter Protein Ice Cream
Who says you can’t enjoy a rich, creamy bowl of ice cream while sticking to your health goals? This High-Protein Chocolate Peanut Butter Ice Cream is proof that you can have it all—delicious flavor, a dreamy texture, and a protein boost to keep you fueled. Whether you’re looking for a post-workout treat, a healthier dessert option, or just a way to satisfy your sweet tooth without the guilt, this recipe has you covered.
The secret to making this ultra-creamy, protein-packed ice cream? The Ninja Creami! Unlike traditional ice cream makers, the Ninja Creami transforms high-protein ingredients into a smooth, indulgent frozen dessert without the need for heavy cream or excessive sugar. It’s a game-changer for anyone who loves ice cream but wants a healthier, macro-friendly option.
With the classic combination of chocolate and peanut butter, this recipe delivers that rich, decadent flavor you crave—while packing in protein to keep you satisfied. Ready to whip up a batch? Let’s dive in!
Serving Size and Preparation Time
- Serving Size: This recipe makes about 2-4 servings, depending on how generous you want your portions.
- Preparation Time: 5-10 minutes to mix the ingredients, plus 8-12 hours to freeze. Once frozen, the Ninja Creami takes just a few minutes to process into ice cream!
Macros and Nutritional Information
Ice Cream (without mix-ins)
Each serving of the High-Protein Chocolate Peanut Butter Ice Cream (based on 4 servings) contains approximately:
- Calories: 160
- Protein: 18g
- Fat: 9g (includes healthy fats from peanut butter)
- Carbs: 6g
Ice Cream with Mix-Ins
If you add mix-ins like mini chocolate chips, crushed peanuts, or crushed Reese’s Pieces, the nutritional breakdown will vary slightly. A serving with mix-ins could contain:
- Calories: 200
- Protein: 20g
- Fat: 12g
- Carbs: 10g (depending on the mix-ins you choose)
This ice cream gives you a solid protein boost to fuel your day, while the healthy fats from peanut butter keep you feeling satisfied. Whether you go for the plain version or add some fun toppings, it’s a balanced, delicious treat that fits into a variety of diets!
Ingredients
To make this High-Protein Chocolate Peanut Butter Ice Cream, you’ll need just a few simple ingredients:
Base Ingredients:
- 1 cup (240ml) unsweetened almond milk (or milk of choice)
- 1 scoop (30g) chocolate protein powder
- 2 tbsp (32g) peanut butter (or powdered peanut butter for a lower-fat option)
- 1 tbsp (5g) unsweetened cocoa powder
- 1 tbsp (15ml) sugar-free maple syrup (or honey for a natural sweetener)
- ¼ tsp xanthan gum (optional, but helps with creaminess)
- Pinch of salt
Optional Add-Ins:
- Mini chocolate chips for extra indulgence
- Crushed peanuts for added crunch
- Crushed Reese’s Pieces for a fun, colorful twist
Mix and freeze your base, then let the Ninja Creami work its magic for a rich, creamy, protein-packed treat!
Equipment Needed
Making this High-Protein Chocolate Peanut Butter Ice Cream is super easy, but having the right tools will ensure the best results! Here’s what you’ll need:
- Ninja Creami – The key to transforming your protein-packed mixture into ultra-creamy ice cream.
- Measuring cups and spoons – For precise ingredient measurements.
- Mixing bowl – To whisk everything together smoothly.
- Blender (optional) – Helps fully incorporate the protein powder and peanut butter for an extra silky texture.
With these simple tools, you’ll be on your way to making a delicious, high-protein frozen treat in no time!
Instructions
Follow these simple steps to make your High-Protein Chocolate Peanut Butter Ice Cream with the Ninja Creami:
Step 1: Mix the Ingredients
In a mixing bowl, whisk together the almond milk, chocolate protein powder, peanut butter, cocoa powder, sugar-free maple syrup, xanthan gum (if using), and a pinch of salt until smooth. If you want an extra creamy texture, blend the mixture for 30 seconds.
Step 2: Freeze the Mixture
Pour the mixture into a Ninja Creami pint container, making sure it stays below the max fill line. Cover and place it in the freezer for at least 8–12 hours, or overnight, until completely solid.
Step 3: Process in the Ninja Creami
Once frozen, place the pint into the Ninja Creami and use the “Ice Cream” setting to blend it into a creamy consistency. If the texture seems crumbly, add a splash of almond milk and respin until smooth.
Step 4: Add Mix-Ins (Optional)
For extra crunch and flavor, stir in mini chocolate chips, crushed peanuts, or crushed Reese’s Pieces using the “Mix-In” setting.
Step 5: Serve & Enjoy!
Scoop into a bowl, add your favorite toppings, and enjoy your rich, creamy, high-protein treat!
Common Mistakes to Avoid
Even simple recipes can have a few pitfalls. Here are some things to watch out for when making your protein ice cream:
Not Freezing Long Enough – If the base isn’t fully frozen, the Ninja Creami can’t work its magic. Overnight freezing is best.
Using the Wrong Protein Powder – Some powders don’t blend well or can make the texture gritty. Whey isolate or casein usually works best for creaminess.
Skipping the Re-Spin – If your first spin is crumbly, don’t give up! Adding a splash of liquid and re-spinning is the secret to perfect creaminess.
Too Many Mix-Ins – Overloading with chocolate chips or candy pieces can make the texture uneven. Less is more for the best scoopable consistency.
Avoid these mistakes, and your ice cream will turn out rich, creamy, and totally crave-worthy every time.
Fun Topping & Mix-In Ideas
If you love a little texture in your ice cream, this is where the fun really starts. Mix-ins and toppings are a chance to get creative while adding extra crunch, sweetness, or even more protein.
Crunch Factor – Crushed pretzels, granola clusters, or chopped nuts give that satisfying bite.
Sweet Additions – Sugar-free chocolate chips, cocoa nibs, or a swirl of sugar-free caramel sauce.
Fresh & Fruity – Add blueberries, raspberries, or sliced banana for a refreshing twist.
Extra Protein – Toss in some high-protein cereal or crumble a protein bar right on top.
The key here is balance—adding enough for flavor and fun without overloading on sugar or calories.
Variations of This Recipe
One of the best parts about making your own ice cream is how customizable it is. Once you’ve nailed down the base recipe, you can play around with flavors and switch things up depending on your cravings.
Nut Butter Swaps – Not a peanut butter fan? No problem! Almond butter, cashew butter, or sunflower seed butter all work beautifully. Each one adds its own unique flavor and nutrition profile.
Different Protein Flavors – Chocolate protein powder is a classic, but you can change it up with vanilla, cookies & cream, mocha, or even peanut butter protein for double the PB power.
Seasonal Twists – Think peppermint extract during the holidays, pumpkin spice protein in the fall, or fresh strawberries blended in during the summer.
With just a few small changes, you can create endless versions of this recipe that keep your freezer stocked with something new every week.
Storing & Meal Prep Tips
Making a batch of this high-protein chocolate peanut butter ice cream ahead of time is perfect for busy weeks when you want a grab-and-go dessert or post-workout treat. Here’s how to store it for the best results:
Freezing After Processing – If you don’t finish it all, you can pop the leftovers back in the freezer. Just know it may firm up again, so plan to let it sit at room temperature for a few minutes before digging in.
Meal Prep Strategy – Prep multiple Ninja Creami pints at once. Mix the base ingredients, freeze them overnight, and then you’ll have ice cream ready to process all week long.
Best Storage Time – For maximum freshness and texture, enjoy within 1–2 weeks. After that, it may start to lose creaminess.
With a little planning, you can have protein-packed ice cream ready anytime the craving hits.
Frequently Asked Questions (FAQ)
Can I make this dairy-free?
Absolutely! Swap almond milk for oat, soy, or coconut milk, and make sure your protein powder is plant-based. You’ll still get a super creamy result.
What if I don’t have xanthan gum?
No worries—it’s totally optional. It just helps improve creaminess. If you skip it, your ice cream may be a little less smooth, but still delicious.
How do I make it sweeter (or less sweet)?
Protein powders vary a lot in sweetness. Taste the mixture before freezing and adjust with a little extra maple syrup, stevia, or honey. For less sweetness, cut back on the syrup altogether.
Do I need a Ninja Creami?
It definitely makes things easier, but if you don’t have one, you can use a traditional ice cream maker or even freeze the mixture and stir it every 30 minutes until creamy. The texture won’t be quite as smooth, but it works!
Conclusion
This High-Protein Chocolate Peanut Butter Ice Cream is the perfect balance of flavor, creaminess, and nutrition. With its rich chocolate-peanut butter combo and protein-packed ingredients, it’s an ideal treat for anyone looking to indulge without the guilt. Plus, the Ninja Creami makes the process a breeze, giving you ice cream that’s just as satisfying as the store-bought version—but better for you!
We encourage you to try this recipe and experiment with your own mix-ins or variations. Want to swap peanut butter for almond butter? Or try a different protein flavor? The possibilities are endless!
If you loved this recipe, share it with your friends on Pinterest or social media, and don’t forget to leave a comment letting us know how it turned out. Happy freezing, and enjoy your delicious, high-protein treat!