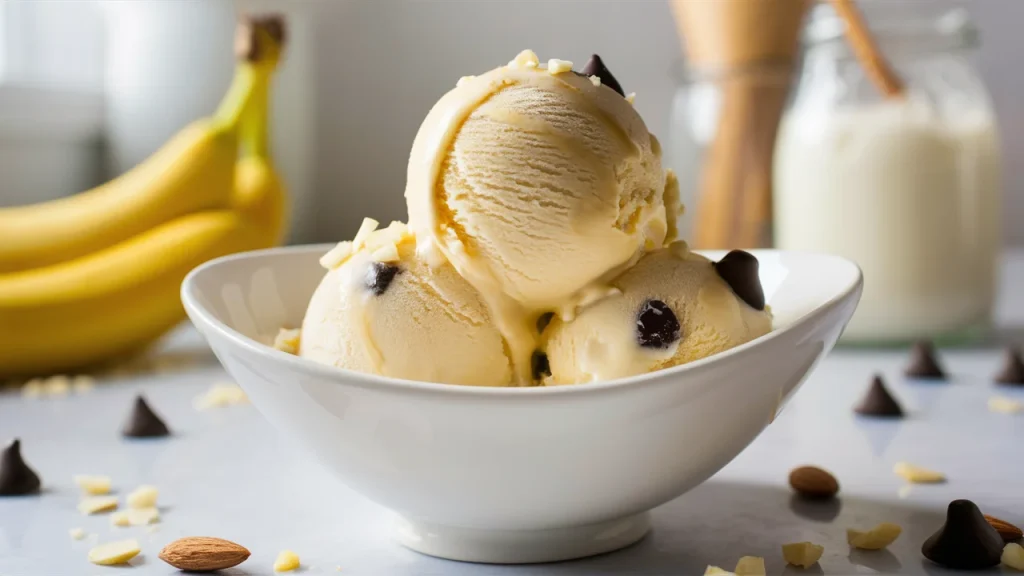
Banana Protein Ice Cream
If you’re looking for a sweet treat that’s both healthy and delicious, this banana protein ice cream is about to become your new favorite dessert. Packed with protein, naturally sweetened with bananas, and irresistibly creamy, it’s the perfect guilt-free indulgence.
Whether you need a refreshing post-workout snack, a high-protein dessert, or just a better alternative to store-bought ice cream, this recipe delivers. The best part? The Ninja Creami makes it incredibly easy. No complicated techniques, no endless churning—just blend, freeze, and let the machine do the work.
Unlike traditional ice cream, which is often loaded with sugar and unhealthy fats, this version keeps things simple, nutritious, and completely customizable. You can adjust the flavor, protein content, and mix-ins to fit your preferences.
If you want a satisfying, creamy dessert without the sugar crash, this banana protein ice cream is the perfect solution. Let’s get started.
Serving Size and Preparation Time
- Serving Size: This recipe makes approximately 4 servings, depending on portion size.
- Preparation Time: The active preparation time is about 10-15 minutes, not including freezing time. Be sure to allow at least 4 hours for the mixture to freeze before using the Ninja Creami for optimal results.
Macros and Nutritional Information
Each serving of banana protein ice cream contains approximately:
- Calories: 180-220
- Protein: 15-20g
- Fat: 4-6g (depending on the type of yogurt and milk used)
- Carbs: 25-30g (primarily from the bananas)
This dessert provides a great balance of protein, healthy fats, and carbohydrates. The protein helps with muscle recovery and keeps you feeling full, while the healthy fats from the yogurt and any added toppings support overall health. The natural sugars from the bananas provide a quick energy boost without the sugar crash.
Ingredients
To make this delicious and high-protein banana ice cream, you’ll need just a few simple ingredients:
- 2 ripe bananas
- 1/2 cup Greek yogurt
- 1 scoop protein powder
- 1/2 cup almond milk
- 1/2 teaspoon vanilla extract
- Pinch of salt
Feel free to customize the ingredients based on your dietary preferences, and you can even add in extra mix-ins like chocolate chips, nuts, or berries if you’d like.
Step-by-Step Recipe
Making this high-protein banana ice cream is a breeze with the Ninja Creami. Follow these simple steps to create a creamy, protein-packed dessert in no time:
Prepare the Bananas
Start by peeling your ripe bananas and cutting them into slices. Lay the slices in a single layer on a baking sheet and freeze for at least 2 hours, or until solid. This step ensures the bananas blend smoothly into a creamy texture.Blend the Ingredients
Once the banana slices are frozen, place them into a blender or food processor. Add the Greek yogurt, protein powder, almond milk, vanilla extract, and a pinch of salt. Blend everything together until you have a smooth and creamy mixture. If the mixture is too thick, you can add a little more almond milk to help it blend.Freeze the Mixture
Pour the banana mixture into a freezer-safe container, spreading it evenly. Cover with a lid or plastic wrap and freeze for at least 4 hours, or until fully frozen.Use the Ninja Creami
Once the mixture is frozen, transfer it to the Ninja Creami pint container. Place the container into the Ninja Creami machine and select the “Ice Cream” setting. The Creami will turn the frozen mixture into a smooth, creamy texture, just like traditional ice cream.Serve and Enjoy
After the Ninja Creami has finished, scoop your banana protein ice cream into bowls or cones. If you’d like, add your favorite toppings, such as chocolate chips, nuts, or fresh berries. Serve immediately and enjoy your homemade, high-protein treat!
This simple recipe is perfect for when you’re craving a cool, creamy, and nutritious dessert that’s quick and easy to make!
Getting the Right Texture and Consistency
To achieve the perfect creamy texture for your banana protein ice cream, the frozen bananas are key. Be sure to freeze your banana slices completely before blending. This creates a solid, creamy base that will blend smoothly when processed. If the bananas are too soft or not frozen long enough, you might end up with a runny texture instead of the rich, creamy ice cream you’re aiming for.
When adding protein powder, it’s important not to overdo it. Too much protein powder can make the ice cream grainy or too thick. Stick to the recommended serving size (usually one scoop) and balance it with enough liquid to maintain smoothness. If the mixture feels too thick after blending, add a little extra almond milk or your preferred milk alternative.
The amount of liquid is crucial in creating the ideal consistency. If the mixture is too stiff before freezing, the ice cream might not have the creamy texture you desire. Start with half a cup of milk and adjust as needed to ensure the mixture is smooth but not too runny.
Lastly, when using the Ninja Creami, be sure to select the “Ice Cream” setting for the best result. This setting ensures the right level of processing to create a perfectly smooth and creamy texture, just like traditional ice cream.
Mix-Ins and Topping Ideas
If you love ice cream with texture and extra bursts of flavor, mix-ins and toppings are where the fun begins. You can keep it simple and light or make it more indulgent depending on your goals. Here are some ideas:
Crunchy Add-Ins – Toss in some chopped nuts, seeds, or a sprinkle of granola for a satisfying crunch.
Chocolate Lovers – Stir in sugar-free chocolate chips, cacao nibs, or even a swirl of melted dark chocolate.
Fruity Twist – Fold in fresh berries, shredded coconut, or dried fruit for natural sweetness and texture.
Nut Butter Drizzle – Peanut butter, almond butter, or cashew butter on top adds creaminess and healthy fats.
For an extra personalized touch, use the “Mix-In” function on the Ninja Creami. This ensures your add-ins are evenly distributed throughout the ice cream instead of just sitting on top.
Variations and Flavor Ideas
One of the best things about this recipe is how versatile it is. Once you master the base banana protein ice cream, you can get creative with endless variations to keep things exciting. A few ideas to try:
Chocolate Banana Protein Ice Cream – Add a tablespoon of unsweetened cocoa powder or chocolate protein powder for a rich, chocolatey twist.
Peanut Butter Banana Protein Ice Cream – Mix in a spoonful of natural peanut butter or powdered peanut butter for that classic sweet-and-salty combo.
Berry Banana Protein Ice Cream – Blend in strawberries, blueberries, or raspberries for a refreshing fruity kick.
Tropical Vibes – Add pineapple or mango chunks along with the bananas for a bright, summery flavor.
Holiday-Inspired – A sprinkle of cinnamon, nutmeg, or even a dash of pumpkin spice can transform this ice cream into a cozy seasonal treat.
The beauty of the Ninja Creami is that it lets you experiment freely. Each batch can be unique, depending on your mood and taste preferences.
Storage Tips
If you happen to have leftovers (which isn’t always easy with a recipe this good!), proper storage will help keep your banana protein ice cream tasting fresh. The best way is to transfer the ice cream into an airtight, freezer-safe container right after making it. A well-sealed container prevents freezer burn and keeps ice crystals from forming, so your ice cream stays creamy instead of icy.
Homemade ice cream is best enjoyed within 1–2 weeks, but if you plan to store it longer, portioning it into smaller containers can help. This way, you only take out what you need, and the rest stays untouched and well-preserved.
When you’re ready to enjoy it again, don’t worry if it feels a little too firm straight out of the freezer. Simply let the container sit at room temperature for 5–10 minutes to soften, or use the “Re-spin” function on the Ninja Creami for a freshly churned texture in seconds.
Frequently Asked Questions (FAQ)
Can I make this without protein powder?
Yes! If you prefer a lighter treat or don’t want the extra protein, you can leave it out. The ice cream will still turn out creamy and delicious, though it won’t be quite as filling.
What if I don’t have the Ninja Creami?
While the Creami makes things incredibly easy, you can still make this recipe with a high-powered blender or food processor. Just note that the texture may not be quite as smooth.
How long does it last in the freezer?
This ice cream is best enjoyed fresh within the first week. It will last up to 2 weeks in an airtight container, but the texture may harden over time. A quick “Re-spin” in the Creami (or letting it sit on the counter for 5–10 minutes) will bring it back to life.
Can I double the recipe?
Definitely! Just make sure you freeze the mixture in multiple containers, since the Ninja Creami works best when processing one pint at a time.
What protein powder works best?
Whey, casein, or plant-based protein powders all work well, but they will each slightly change the texture. Whey tends to make it fluffier, casein makes it thicker, and plant-based options keep it dairy-free.
Conclusion
This banana protein ice cream is the perfect balance of indulgence and nutrition, offering a creamy, high-protein dessert that satisfies your sweet tooth without the guilt. Thanks to the Ninja Creami, making this treat at home is quick, easy, and customizable to your taste. Whether you’re looking for a post-workout snack or a healthier dessert option, this recipe is a winner. With its simple ingredients, smooth texture, and delicious flavor, it’s sure to become a go-to treat in your kitchen. Enjoy and feel good about every bite!